3 min to read
HNSCanada Node
Setting up a Handshake Full Node

Setting up HNSCanada Handshake Node
First Steps
The first step is to get a Linux server with a cloud provider. In this case, I am using a 2 GB Linode VM with a 1 CPU Core and 50 GB Storage + an additional 100 GB volume for extra storage space
Once you get your VM, SSH into it an you need to git clone Handshake’s Deamon and Full node:
git clone git@github.com:handshake-org/hsd.git
Please follow the official install guide here: https://github.com/handshake-org/hsd/blob/master/docs/install.md
Node Information
Our second step is to do the node synchronization, which takes almost an entire day (depending on your system configuration too). Be patient with this step, it takes a while.
./mnt/hnsvolume/hsd/bin/hsd --prefix /mnt/hnsvolume/.hsd
Please note that the node synchronization takes place on the volume mount, should not be done on the root of the virtual machine because it will exceed the 50 GB storage capacity.
Next, we need the full CLI call:
./mnt/hnsvolume/hsd/bin/hsd --prefix /mnt/hnsvolume/.hsd --listen --public-host <YOUR_VM_IP> --max-inbound 100 --bip37 true --rs-host 0.0.0.0 --agent=<YOUR_AGENT_NAME> --wallet-migrate=2 --http-host=0.0.0.0 --wallet-http-host=0.0.0.0
Ports:
    :12038 # for regular inbound connections
    :44806 # for P2P inbound connections (brontide)
Let it sync.
How to Create a Handshake HSD Daemon Service on Ubuntu 22.04
Create service file named hsd.service
    [Unit]
    Description=Handshake HSD Service
    [Service]
    Type=simple
    WorkingDirectory=/mnt/hnsvolume/
    ExecStart=/mnt/hnsvolume/hsd/bin/hsd --listen --public-host <YOUR_VM_IP> --max-inbound 100 --bip37 true --rs-host 0.0.0.0 --agent=<YOUR_AGENT_NAME> --wallet-migrate=2 --http-host=0.0.0.0 --wallet-http-host=0.0.0.0
    Restart=always
    [Install]
    WantedBy=multi-user.target
Copy service file to path /etc/systemd/system/
sudo cp /home/hsd.service /etc/systemd/system/hsd.service
Start service:
sudo systemctl start hsd
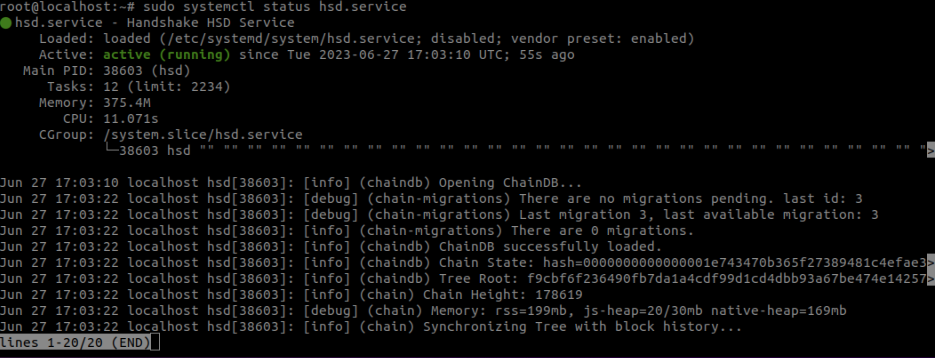
Check status:
sudo systemctl status hsd.service
Final Steps
Now, you need to generate a strong API Key. Please follow the instructions here.
API Key ORTBE5yoRS6mJxi6NDwRQXnqmMiBLGFr (this is a fake key)
Time to set up the firewall

And, we are ready to use the API with our Full Node. Here is an example, calling the getnameresource attribute:
    name=”hnscanada”
    curl http://x:ORTBE5yoRS6mJxi6NDwRQXnqmMiBLGFr@node.hnscanada.ca:12037 -X POST --data '{ "method": "getnameresource", "params": ["'$name'"] }'
Where my node.hnscanada.ca points to the IP of the Linode VM
Results in:
    {
    "result": {
        "records": [
        {
            "type": "GLUE4",
            "ns": "ns1.hnscanada.",
            "address": "44.231.6.183"
        },
        {
            "type": "NS",
            "ns": "ns1.hnscanada."
        },
        {
            "type": "GLUE4",
            "ns": "ns2.hnscanada.",
            "address": "54.214.136.246"
        },
        {
            "type": "NS",
            "ns": "ns2.hnscanada."
        }
        ]
    },
    "error": null,
    "id": null
    }
And this result is the begining of Hnswhois which will be another post. Stay tuned.
Montly Costs
The cost breakdown is as follows:
- Linode 2GB - hnscanada = $12 USD + tax
- Storage Volume - 100 GiB = $10 USD + tax
- Total = $25.30 USD ~ $35 CAD
Yes, decentralization has a cost, nothing comes free.
Credits
Thank you to Nathan Woodburn for helping me set up the Firewall and fix my HSD CLI command which was not working before.


Comments